Physical Prototyping for HCI
Physical Prototyping | UX Design
Before starting my Masters in HCI at Georgia Tech, I had worked almost uniquely with software. In the hopes of expanding my breadth of knowledge in the field of UX, I decided to take an introductory class on physical prototyping to round out my prototyping skills. This portfolio piece showcases a number of physical prototyping mini sprint projects I completed in this class.
Overview
Description
This piece documents the projects I completed for the Physical Prototyping for HCI class (CS 8803-PP) at Georgia Tech. I took this class to strengthen my physical prototyping skills as well as increase my breadth of understanding of HCI as a field of study.
This piece consists of four parts: cutting foam core, rapid prototyping in pink foam, laser cutting an interactive model, and 3D modeling with electronic components.
UX Design: sketching, storyboarding, iterative design
Timeline
August 2019 - December 2019
Tools
Foam Core, exacto knife, pink foam, sandpaper, Solidworks, laser cutting, 3D printing, Circuit Playground Express, Arduino
Part 1: Studies in Foam Core

A replica of my iPhone XR as a foam core model. It was cut by hand using an exacto knife and a ruler.

A series of circular foam core pieces. These pieces were cut to test how each size felt when one was holding it in one’s hand. I used this process to determine the form of the model I developed in Part 4: 3D Modeling with Electronic Components.
Part 2: Rapid Prototyping in Pink Foam


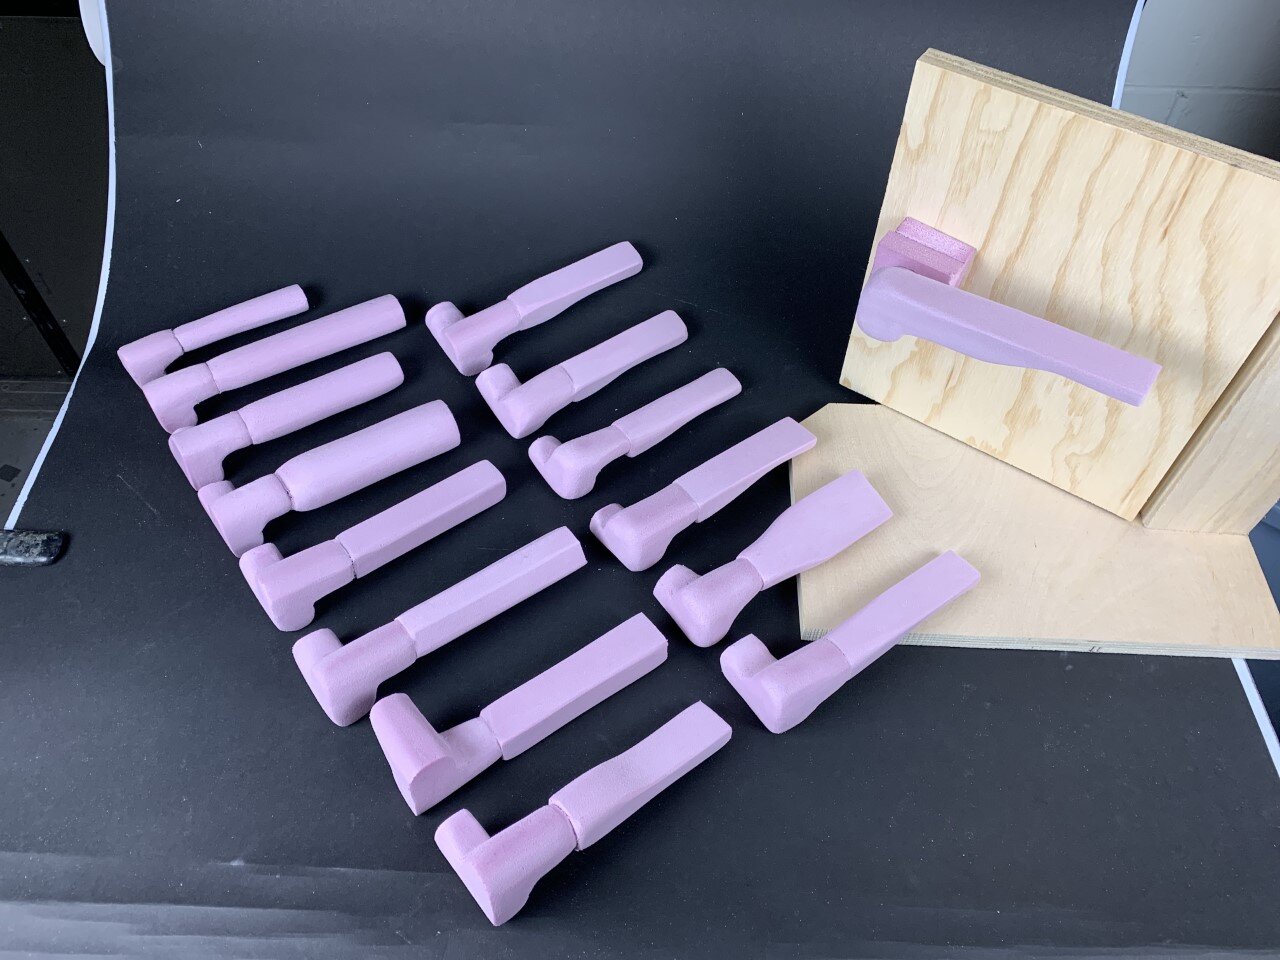
This project was a study of rapid prototyping. I created 15 iterations of a door knob using pink foam. With each iteration, I made one change to the door knob’s design. Whether that change was the size of the object, the shape of the grip, or the fillets on the edges, each iteration contributed to making the final product more effective, usable, and clean. Additionally, I created the wooden door seen above to help with testing interactions with each model. By iteration 15 (seen in the door), I had developed an object in which every aspect of its design was informed by testing different variations of those features.
Part 3: Laser Cutting an Interactive Model


The above pictures represent the initial storyboarding for my interactive model, a safe. The user of in this instance is setting up their pass code for a new safe, putting something inside, relocking the safe, and then opening it again by using the new pass code.

The above image and video show the results of developing my safe in Solidworks. The most difficult portion of this work was developing the lock mechanism. The door’s turnable knob is connected to another circular cardboard cutout with an extended side. When the extended side sat horizontally, the door would not open. In order to simulate a locked safe, I added a stopper that sits on top of the extended piece of the knob and sticks out the top of the safe (so that I can hold it in place).


The above photos show the process by which I assembled my safe as well as some photos of the final result.
Part 4: 3D Modeling with Electronic Components

You’re probably going to want a little context for this one…
So I’m a huge fan of Dungeons and Dragons. It’s a fantasy tabletop roleplaying game, if you’ve never heard of it. Ever wanted to go travel a magical medieval world fighting monsters and getting into any manner of trouble you can think of? I sure do - I do it twice a week!
Now there’s just one problem: how do I talk to my party members who went off to dungeon crawl in another area of the map, clearly out of earshot? A sending stone, of course! Sending stones are gems that are connected to each other via magical properties. They’re characterized by their ornate design, magically-infused runes, and absurd price tag. For this project, I set out to create my own light up sending stone.


The first part of this project was deciding on the form of the sending stone I wanted to develop (left). I was almost entirely sold on the design of the red gem I saw online, but I wanted to brainstorm different forms as well as plan how the hardware would fit into the 3D model.
This process was also an excellent example of arriving at technical limitations and adapting. Originally, I wanted to develop two sending stones that would light up when either user was talking. However, trying to get two Circuit Playground Expresses to communicate with each other through multiple layers of 3D model while the users stood feet apart just was not feasible in the time that I had. Therefore, I decided to pivot to developing one sending stone. If I was ever to revisit this project, I would work to make my original vision a reality.


The above pictures show the development of my sending stone. I started out with circular pieces of white foam core to test how each size would fit in my hand. Once I had picked a size I liked, I modeled the gem with pink foam to experiment with the number and depth of cuts. I then set out to model the stone in such a way that it would allow the hardware to fit comfortably within it. Next was the 3D modeling phase, which required multiple iterations of printing in order to get right. After my first print, the battery wouldn’t even fit in it’s slot. In order to guarantee that would not happen again on the second iteration, I added a hole for a wire to fit through as well.
The above videos show the assembly of my sending stone with the battery inserted (left) and a demo of the sending stone lighting up when I talked into it.
Self Reflection
This class was easily one of the most difficult I have ever taken in my five years at Georgia Tech. Physical prototyping is an incredibly demanding and time consuming pursuit, even more so when you are new to it. Those 15 pink foam doorknobs easily took me 20 hours to finish, and I can still feel how badly my feet hurt after a particularly long day in the design shop. This class gave me a serious appreciation for people who have refined their skills in this field enough to rapid prototype at a speed that is actually… rapid. I was properly reminded that the skills we UXers work so hard to develop aren’t going to come to us overnight. They take practice, dedication, and so much time.
I can also confidently say that this class pushed me out of my comfort zone in just about everything it taught me. My Bachelor’s degree is in programming and traditional design; I was going to be a front end designer/developer had I not gone to grad school. It’s safe to say I had next to no physical prototyping skills and could not fathom how it was done. But now I understand. I certainly achieved my goal of expanding my breadth of knowledge in the field of UX. And while this process reaffirmed for me that research is my one true passion, I can now advance forward as a professional with a greater understanding of how the design process work without fear of getting physical.
This piece is dedicated to Noah Posner, my professor for this class.
I met Noah as a rising sophomore at Georgia Tech. I was looking for a part time job to sharpen my coding skills and was talking to my friend who worked in his lab while getting lunch at the food court. Coincidentally, Noah was there too. From there I was brought on as a programmer for the IMAGINE Lab at Georgia Tech where I spent my remaining 3 years of undergrad. That was also where Noah repeatedly told me about the wonderful MS-HCI program here at Tech and how I should apply. The rest is history.
I literally would not be where I am if it was not for Noah, and I am grateful every day for his guidance, support, and unrelenting commitment to the GT MS-HCI community.
Thank you so much.